My Mom-Vintage Card

I created this card using the Botanical Sizzix 3D embossing folder, a Stampabilities rubber stamp, and lace.

I wanted to make a vintage card, in memory of my Mom, but the printer I had wasn’t a photo printer. Recently, I bought an Epson printer (on sale) and was able to print this amazing photo of my Mom.

Materials Used:

  • Brown Cardstock
  • Core’dinations Sand It, Tear It, Emboss It, Love It, Chocolate Mousse
  • Sizzix 3-D Texture Fades, Botanical, 662716
  • Stampabilities, Faded Text Background, TR 1011
  • Lace
  • Memento Ink, Tuxedo Black
  • Fiskars Procision Rotary Bypass Trimmer (12”)
  • Martha Stewart Scoring Pad/Fiskars Dual-Tip Embossing Stylus
  • Scor-Tape: 1/2″ and 3/8”
  • Photo Paper, Semi-Gloss, 4” x 6”
  • Ranger Craft Scrubbie

Machines:

  • Sizzix Big Shot, with the Extended Multipurpose Platform and one cutting pad for the 3D Texture Fades Embossing Folder-please see Tim Holtz’s video for the sandwich: https://www.youtube.com/watch?v=iDjoXPS5srw
  • Printer (The one I bought was the Epson XP-6000.)

Have a blessed day!!!

Diane

October Dreams

I created this card using Distress Inks, Alcohol Inks, and Lavinia stamps.

I’ve entered this card in the October Lavinia Stamps Challenge. The Python Random Generator chooses the winner. Hopefully, one of these days, it will pick me.

The end result of the alcohol inks was a happy mistake…

I put drops of alcohol inks on Yupo paper and used my Giottos Rocket Air Blaster to guide the direction of the inks. I filled the sheet with these drops, and then looked to see if any images caught my eye. What came to mind were rocks on the bottom of the ocean.  (I swear the wood designs, in one of my house doors, looks like a dragon.)  

Here’s the happy mistake part…to preserve the alcohol inks, I sprayed Krylon Matte Finish over them. I either sprayed too much, or sprayed it too close (because it’s worked before). I thought, ‘Oh nooooooo. I’ve ruined it, and it took so much time to make.’ I looked at it again. The spray had made it appear that there was moss on the rocks and the mushroom. Well, ok.

Materials Used:

  • Strathmore Watercolor Paper, Cold Press, 140 lb.
  • Tim Holtz Alcohol Ink Yupo Paper, Translucent
  • Turquoise Sparkle Paper Cardstock Base
  • Ranger Alcohol Inks: Turquoise, Limeade, and Valencia
  • Ranger TH Distress Inks: Tumbled Glass, Mermaid Lagoon, and Salty Ocean
  • Lavinia Stamps: Guinevere, Willow Leaf (seaweed), and Deeper than the ocean (sentiment) (Tracey Lavinia Dutton is the artist of the Lavinia stamps.)
  • Giottos AA1900 Rocket Air Blaster, LARGE
  • TH Tonic Stamp Platform
  • Two Ranger non-stick Craft Sheets (I use one for distress inks and an older one for alcohol inks.)
  • Memento Ink, Tuxedo Black
  • Ranger TH Mini Ink Blending Tool/Foam
  • Ranger Mister
  • Wink of Stella
  • TH Mini Scissor
  • Fiskars Procision Rotary Bypass Trimmer (12”)
  • Martha Stewart Scoring Pad/Fiskars Dual-Tip Embossing Stylus
  • Scor-Tape: 1/4″and 3/8”
  • Krylon Matte Finish
  • Ranger Craft Scrubbie
  • Rubber Gloves, Baby Wipes, and Paper Towels

Have a magical day!!!

Diane

Mechanics 3-D Texture Fades-Life is a Circus

I created this card using the Mechanics 3-D Texture Fades Embossing Folder, Copper Foil Cardstock, Deco Art Metallic Lustre, and a Stampendous stamp.

PATINA, I thought I knew it. I’ve been watching, and loving, American Pickers forever. But, when it came to me creating the look of patina…not so much. Thinking back, it probably would have been easier if I’d looked at an ACTUAL picture of it, rather than trying to remember seeing it on the show. Especially when what I remembered most, when trying to visualize it, was Mike’s excitement when finding something that wouldn’t have existed without the patina holding it together.

The 3-D Texture Fades embossing folders show such detail. I love that!

If you’d like to check out how I used this embossing folder in my Big Shot, please follow this link:

https://cardtreasuresbydiane.com/index.php/2018/10/14/botanical-3d-texture-fades/

Materials used:

  • Copper Foil Cardstock
  • Core’dinations Cardstock, Jet Black
  • Turquoise Cardstock Base
  • Sizzix 3-D Texture Fades, Mechanics, 662715
  • Spellbinders, Classic Rectangle SM, S4-130
  • Deco Art Metallic Lustre, Brilliant Turquoise
  • Embossing Buddy
  • VersaMark Watermark Stamp Pad
  • Ranger Turquoise Embossing Powder
  • Darice Heat Tool
  • Stampendous ‘Life is a Circus’ Rubber Stamp, H290
  • Fiskars Procision Rotary Bypass Trimmer (12”)
  • Ranger non-stick Craft Sheet
  • Martha Stewart Scoring Pad/Fiskars Dual-Tip Embossing Stylus
  • Cosmetic sponge (I used this to apply the Metallic Lustre on the Copper cardstock.)
  • Scor-Tape: 3/8” and 1/2″
  • Baby Wipes/Paper Towels

Card Two:

The main difference with this card is that I started with silver foil cardstock; then applied both Turquoise and Iced Expresso Deco Art Metallic Lustres to get the look of patina. The die used was Sizzix Framelits Banners #3, 561152. The sentiment was embossed with Ranger Gold Embossing Powder, and the cardstock base was Core’dinations, Jet Black.

Machines:

  • Sizzix Big Shot, with two cutting pads, and the magnetic platform
  • Sizzix Big Shot, with the Extended Multipurpose Platform and one cutting pad for the 3D Texture Fades Embossing Folder (please see Tim Holtz’s video for his sandwich:  https://www.youtube.com/watch?v=iDjoXPS5srw)

Have a beautiful day!!!

Diane

Botanical 3D Texture Fades-Vintage

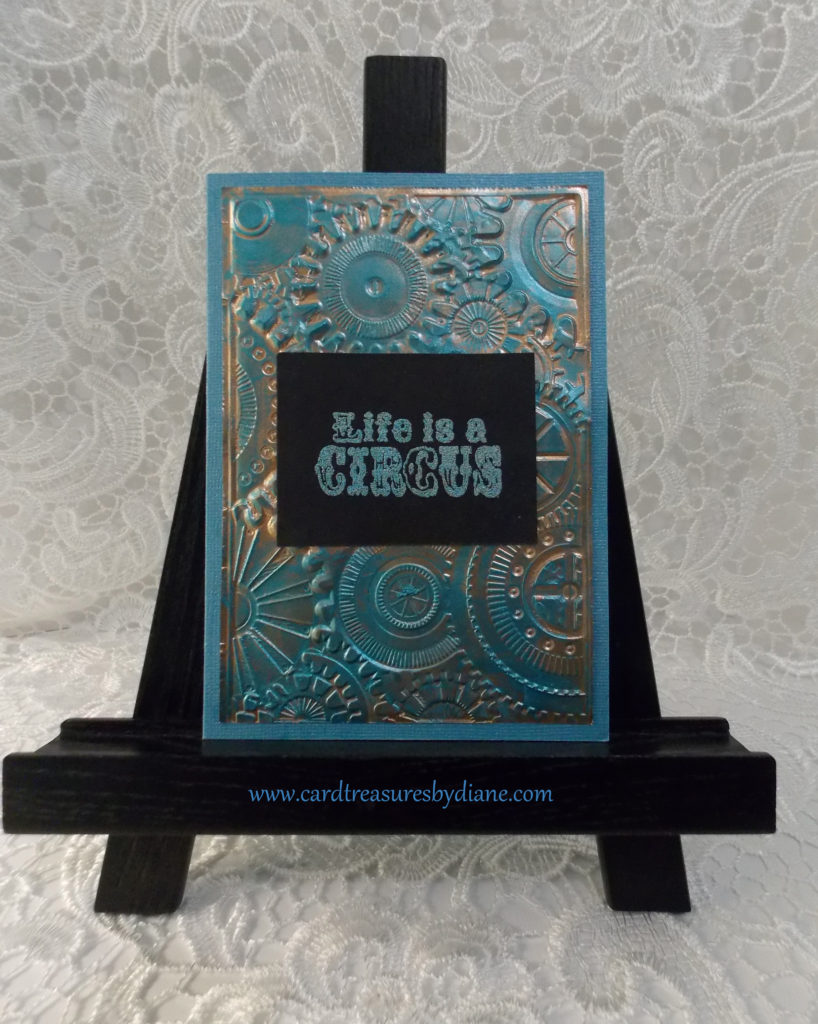
I created this card using the Botanical 3-D Texture Fades Embossing Folder, Spellbinders dies, Cosmic Shimmer Gilding Flakes, and an image from Tim Holtz idea-ology.

The 3-D embossing folders caught my eye while I was walking through Hobby Lobby the other day. I watched a couple videos about them on my phone and started thinking about the possibilities…I decided to get a couple.

These embossing folders are thicker than the normal ones, so I needed to feed it through my Big Shot differently. I misted both sides of a piece of foil cardstock, to soften the fibers, and placed it in the embossing folder. I put the folder on the multipurpose platform base, plus Tab 1; placed a cutting pad on top of the folder; and ran it through my Big Shot four-five times. Because of the thickness of the embossing folder, the folder acts as one of the cutting pads. Then I used one of the Spellbinders Labels Twenty dies to cut the embossed cardstock into the shape that I wanted.

(I learned how to use the 3-D embossing folders by watching Tim Holtz’s video:

https://www.youtube.com/watch?v=iDjoXPS5srw

I tried laying the embossing folder on the top of the platform, as Tim does in his video, but it seemed  too thick to go through my Big Shot. I didn’t want to chance it. I think it might just be my particular Big Shot, or that his Vagabond cutting machine is more powerful because it’s electric.)

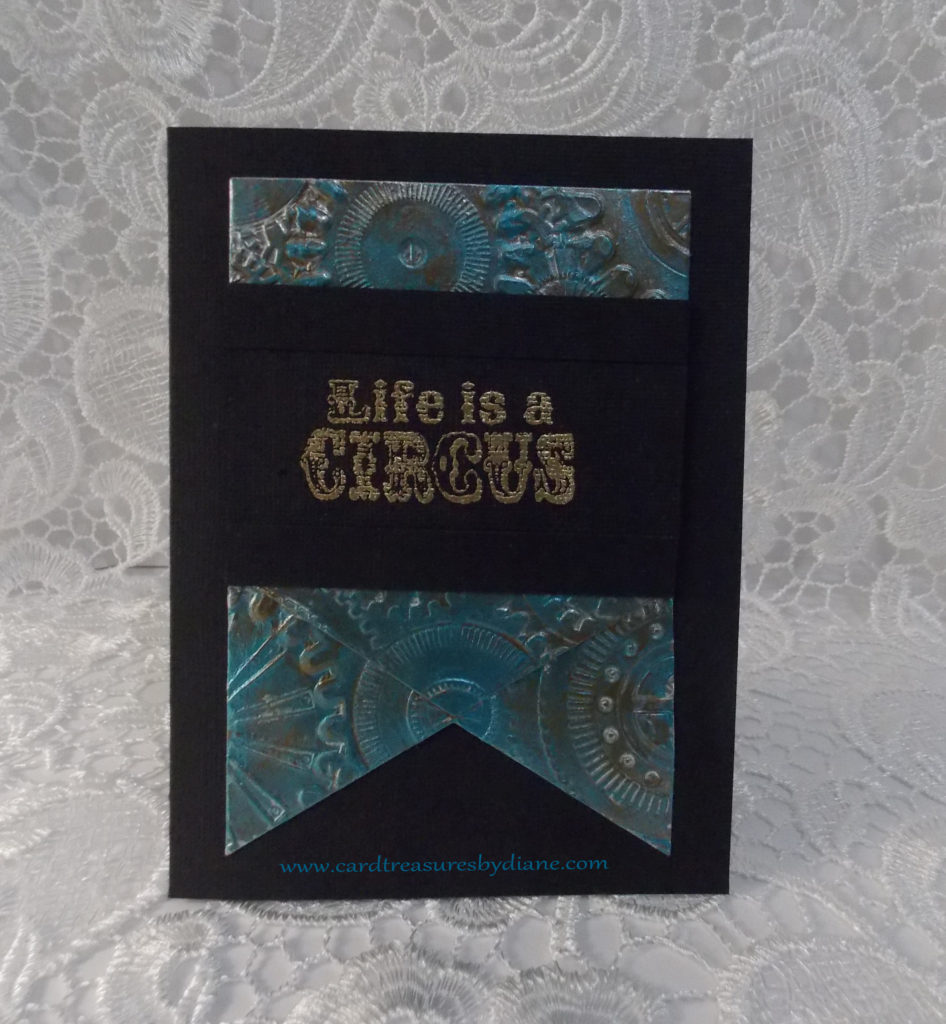
The next step in making this card…The second die-cut was made using a Spellbinders Tranquil Moments die. After I removed all the extra pieces with my Cricut Weeder, I put strips of 1-1/2” Scor-Tape on the back (sticky side up) covering that whole side with the tape. I pressed pieces of the gilding flakes into the tape on the front and lightly buffed them using a piece of Ranger Rub It-Scrub it Pad that I keep specifically for that purpose.

I removed the Scor-Tape backing from the other side and anchored the die-cut piece onto the purple cardstock base. Next, I put Scor-Tape on the back of the embossed 3D cardstock.  Before I attached it, I added a couple small pieces of purple adhesive foam under the top and the bottom where it overlapped, to give it stability.

I used another of the Tranquil Moments dies for the sentiment. I added Scor-Tape at the two ends (underneath) and fussy cut to remove the excess tape. The gilding flakes were added again on top. I did a quick swipe with my Embossing Buddy; stamped the sentiment with the Hampton Art rubber stamp and VersaMark; sprinkled gold embossing powder on top of that; and used my heat gun to emboss it. I added Scor-Tape on the back and anchored it onto the purple cardstock. To add some sparkle, I added a couple strips of tiny faux gemstones.

I put Wink of Stella over the entire area of the bride and groom image. The camera didn’t really capture the shimmer. I attached the image and added  faux pearls and Swarovski crystals.

Materials Used:

  • Purple Cardstock
  • Gold Foil Cardstock
  • Sizzix 3-D Texture Fades, Botanical, 662716
  • Spellbinders Card Creator, A2 Tranquil Moments, S5-216
  • Spellbinders Nestabilities, Labels Twenty, S5-026
  • Hampton Art, Once Upon a Time, Rubber Stamp, DF2203
  • Tim Holtz idea-ology Paper Dolls
  • Cosmic Shimmer Gilding Flakes, Warm Sunshine
  • VersaMark Watermark Stamp Pad
  • Ranger Embossing Powder, Gold
  • Embossing Buddy
  • Darice Heat Tool
  • Cricut Tools Weeder
  • Ranger Mister
  • Small piece of Ranger Rub It-Scrub It Stamp Cleaning Pad
  • Fiskars Procision Rotary Bypass Trimmer (12”)
  • Martha Stewart Scoring Pad/Fiskars Dual-Tip Embossing Stylus
  • Tim Holtz Mini Scissors
  • Purple Adhesive Foam Sheet
  • Wink of Stella
  • Imagine Crafts Craft Mat, Blue
  • Faux Pearls and Swarovski Crystals
  • Ranger Glossy Accents (to anchor the pearls and crystals)
  • Scor-Tape: 1/8”, 1/4″, 1-1/2”
  • Baby Wipes

Machine:

  • Sizzix Big Shot, with two cutting pads, and the magnetic platform
  • Sizzix Big Shot, with the Extended Multipurpose Platform and one cutting pad for the 3D Texture Fades Embossing Folder

Next, the Mechanics 3-D Texture Fades Embossing Folder… (if a fairy doesn’t whisper in my ear saying “Make a fairy card first.”)

Thanks for stopping by my website! Have a beautiful, peaceful day!!!

Diane